How to Create Realistic AI Photos
Learn how to create realistic AI photos that look real. This guide covers prompt engineering, advanced tools, and techniques for lifelike AI image generation.
When you see an AI-generated photo that’s so good it makes you do a double-take, you're looking at the future of visual content. These aren't just filtered images; they are created from scratch by powerful AI models, like the one inside CreateInfluencers. The tech has gotten so sophisticated that it can understand the subtle play of light, the texture of skin, and the complexities of human anatomy to produce stunningly lifelike images.
All it takes is a simple text description to generate a high-resolution picture ready for your next marketing campaign, social media post, or creative project. The best part? No expensive camera gear, no studio, no models.
Why Realistic AI Photos Are A Game Changer
Being able to generate photorealistic images is way more than just a cool party trick—it's completely changing how we create content. For decades, if you wanted top-tier visuals, you had to deal with the high costs of photoshoots, the headache of coordinating with models, and hours of editing. This new technology completely levels the playing field, giving anyone the power to produce professional-grade visuals in an instant.
This isn't just a trend; it's a massive market shift. The synthetic image generation market was valued at approximately USD 1,778.3 million and is on track to rocket past USD 9 billion by 2033. That explosive growth is all thanks to industries needing a constant flow of fresh, eye-catching content without the traditional costs and delays. You can dig into more of the numbers in this synthetic image generation research.
The Real-World Impact
The practical uses are immediate and incredibly powerful. A marketing team can spin up a diverse ad campaign on the fly, experimenting with different models, backgrounds, and styles without ever setting foot in a studio. A social media manager can craft an endless stream of lifestyle content featuring a consistent, on-brand AI influencer.
Here’s why so many people are jumping on board:
- Massive Cost Savings: Forget the costs of professional photographers, model fees, and location scouting. They're practically gone.
- Unbelievable Speed: Content production timelines shrink from weeks to mere minutes. This means you can launch campaigns and run A/B tests faster than ever.
- Total Creative Freedom: You can now bring ideas to life that were once too expensive or logistically impossible. Want to place your AI model on a volcano at sunrise? You can do that in seconds.
For creators, this is a huge leg up. You can build entire brands around virtual personalities, generating a steady stream of high-quality content that truly connects with your followers.
In this guide, we’re going to zero in on CreateInfluencers. It's a tool I've found to be exceptionally good at creating hyper-realistic people and scenes. I'll walk you through exactly how to write effective prompts and tap into its features to make your own incredible AI photos.
You can also check out our affiliate program to see how you can earn by sharing these powerful tools with your own audience.
Getting Your AI Photos to Look Real: It's All in the Prompt
The secret to creating truly realistic AI photos isn't buried in some complex setting; it’s all about the words you choose. To get those jaw-droppingly lifelike results from CreateInfluencers, you have to shift your thinking. Stop describing a scene and start directing it like a photographer on a professional shoot.
It really comes down to layering in specific, sensory details.
Think about it this way: "a woman in a jacket" is vague. The AI has to guess what you mean. But "a woman wearing a worn, faded denim jacket" gives it a texture and a history to work with. That small tweak makes a huge difference. The same goes for the background. "City background" is flat, but "out-of-focus city lights at dusk, creating a soft bokeh effect" tells the AI about the lighting, the time of day, and even the mood you're after.
Start Talking Like a Photographer
Here’s where you’ll see the biggest leap in quality. When you start using the language of photography in your prompts, the results can become almost indistinguishable from a real camera shot. Why? Because the AI learned from millions of actual photographs, many of which had detailed metadata attached—the camera used, the lens, the settings.
By adding these technical terms, you're giving the AI a blueprint for recreating the look and feel of a high-end photoshoot. Here are the key elements I always include:
- Mention the Gear: Specifying something like "shot on a Canon EOS R5 with an 85mm f/1.2 lens" instantly pushes the AI towards a professional, high-resolution portrait style. You're telling it how to see the world.
- Dictate the Depth: Terms like "shallow depth of field" or "creamy bokeh background" are your best friends for creating that classic professional look where the subject pops and the background melts away into a beautiful blur.
- Control the Light: "Good lighting" is useless. Be specific. Is it "soft morning light filtering through a window" or "dramatic side-lighting with soft shadows"? Each one creates a completely different emotional tone.
When you weave these elements together—detailed subject, specific background, and precise camera language—you’re not just writing a prompt. You’re building a complete visual recipe. This is the exact method I use to get consistently high-quality, realistic AI photos that feel genuine.
If you want to see more of these strategies in action and get more ideas, I highly recommend checking out some of the guides on the CreateInfluencers blog.
From Vague Ideas to Lifelike Images
Let’s look at a few common scenarios. The difference between a generic prompt and a detailed, photographic one is stunning.
A well-crafted prompt gives the AI a clear set of instructions, covering everything from the subject's expression to the specific lens characteristics. This table breaks down the components that have the biggest impact on realism.
Prompt Components for Lifelike AI Photos
| Component | Example | Impact on Realism |
|---|---|---|
| Subject & Action | A woman in her 30s, smiling confidently | Defines the model's age, emotion, and posture, adding authenticity. |
| Lighting | Soft window lighting, golden hour sunlight | Creates mood and depth; mimics real-world lighting conditions. |
| Environment | Office background with blurred plants | Adds context and uses depth to focus attention on the subject. |
| Camera & Lens | Shot on a Sony A7 IV, 85mm f/1.8 lens | Simulates the signature look of professional photography gear. |
| Camera Settings | Shallow depth of field, natural candid moment | Specifies the photographic style, from technical (aperture) to artistic (candid). |
As you can see, each element builds upon the last, giving the AI less room for error and more direction to create something that feels like a captured moment in time, not just a digital rendering.
Practical Prompt Examples
Let's put this all together and compare a basic prompt to one built with these principles.
Here's the breakdown of how the prompts create such different outcomes:
- The Goal: A simple corporate headshot.
- The Basic Prompt: "A professional woman in an office."
- The Photorealistic Prompt: "Professional corporate headshot of a woman in her 30s, smiling confidently. Soft window lighting, office background with blurred plants. Shot on a Sony A7 IV, 85mm f/1.8 lens, shallow depth of field."
And here's another one, for a more casual, lifestyle shot:
- The Goal: A man on vacation.
- The Basic Prompt: "A man on vacation."
- The Photorealistic Prompt: "Candid photo of a man in his 20s, laughing. Wearing a linen shirt, exploring a vibrant street market in Lisbon. Golden hour sunlight, natural candid moment, shot on a Fujifilm X-T4, 35mm lens."
The basic prompts will likely give you something that looks sterile and obviously AI-generated. The photorealistic prompts, on the other hand, produce images that feel authentic, dynamic, and full of life because you’ve given the AI the specific, layered instructions it needs.
Alright, you’ve got the theory down on what makes a great prompt. Now it's time for the fun part: actually creating your first image. We'll be using CreateInfluencers for this, which I've found to be one of the more straightforward platforms for getting realistic results without a steep learning curve.
The goal here isn't to feel like you're programming a machine; it’s more like you're the director of a photoshoot, giving precise instructions to get the exact shot you want.
Let's imagine you're creating a lifestyle shot for an up-and-coming artisanal coffee brand. You need an image of a welcoming barista, maybe mid-thirties, in a warm, rustic-looking café. This is where you'll plug in the detailed prompt we talked about earlier. When you log in, you'll see a dashboard with clear options for choosing a model, tweaking their pose, and the prompt editor itself. Everything you need is right there.
Getting Around the Interface
The layout is designed to keep the important stuff right at your fingertips. Most of your time will be spent in the generation panel—this is where you bring your idea to life. You'll pick a starting model, adjust the pose, and then get to work on your positive and negative prompts.
Now, here’s a tip that a lot of people new to AI image generation miss: don't sleep on the negative prompt. This is your chance to tell the AI exactly what you don't want to see. For our coffee shop scene, a solid negative prompt would be something like: 3d render, cartoon, disfigured, blurry, extra limbs, bad anatomy. This one simple line does a ton of heavy lifting, steering the AI away from common weird artifacts and keeping the final photo looking clean and realistic.
It's wild to think about, but estimates suggest that around 34 million AI images are generated every single day. That's a massive amount of content, which just goes to show how critical these tools are becoming for creators and marketers.
From Your Words to a Finished Photo
This infographic really breaks down how to build your prompt from the ground up, moving from the basic subject to the tiny details and camera settings.
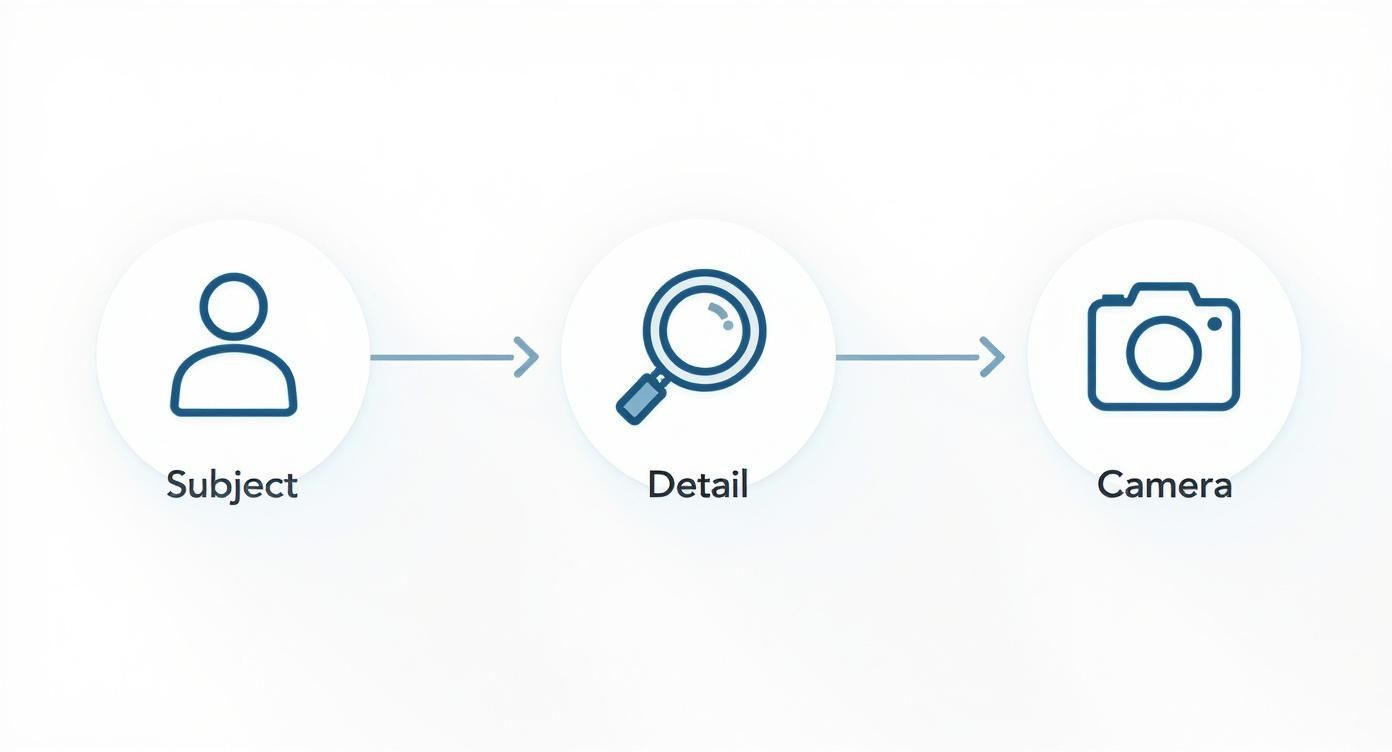
Think of it as layering. You start broad and get more and more specific. Once your positive and negative prompts are locked in, you just hit the generate button and let the platform do its thing.
While CreateInfluencers is a fantastic tool for creating these kinds of realistic AI photos, it’s always smart to know what else is out there. There are plenty of other AI post generator platforms that might offer different features or a workflow you prefer.
Pushing Past the Basics for True Realism
Once you've got the hang of writing a solid prompt, it's time to explore the more advanced tools. This is where you can really start to fine-tune your realistic AI photos, moving from "good enough" to images that are practically indistinguishable from actual photography. These methods give you more granular control, letting you fix small issues without having to scrap an otherwise great image.
A great example is prompt weighting. This is just a way of telling the AI which parts of your prompt matter most. Let's say you're creating an image of a model in a specific designer jacket. By adding more weight to "denim jacket," you're signaling to the AI that this element is non-negotiable and needs to be the star of the show.
Getting Consistent Characters and Perfect Edits
Making one fantastic photo is great, but what if you need a whole series featuring the same person? This is a common hurdle, and the solution is seed numbers. Think of a seed as the unique starting point for the AI's creative process. If you use the same seed number on your next prompt, you're telling the AI to start from that same point, which helps maintain the character's appearance.
This is how you can create an entire "photoshoot" with the same AI influencer, just by changing the pose, outfit, or background in your prompt while keeping the seed the same. We dive deeper into this and other pro-level tips in our complete library of guides. You can find them all at https://createinfluencers.com/guides.
Another indispensable tool is inpainting. This feature is a lifesaver. It lets you highlight a small area of your finished picture and regenerate just that part with a new, focused prompt. Got a nearly perfect shot ruined by a weird-looking hand or a misplaced object? Inpainting lets you fix it directly instead of re-rolling the entire image dozens of times.
Here's a tip that might seem backward at first: the secret to ultimate realism is often imperfection. A perfectly symmetrical face or flawless skin can look sterile and digital. Intentionally adding things like subtle skin texture, flyaway hairs, or slight asymmetries is what makes an AI-generated person feel truly human.
As a final touch to pull your images together, consider using AI-enhanced presets. These are a fantastic way to apply a consistent, professional-looking color grade and lighting style across your entire series, giving your work that polished, finished look with just a click.
Common Pitfalls and How to Fix Them
Getting into realistic AI photos is an exciting journey, but it's rarely a straight shot to a perfect image. You can write what feels like the ideal prompt and still end up with some bizarre results. It happens to everyone. The trick is knowing what went wrong and how to fix it without starting from scratch.
One of the biggest hurdles you'll face is the infamous "uncanny valley." This is when a face is almost perfect, but some tiny flaw—lifeless eyes, skin that looks like plastic—makes the whole thing feel creepy. And then there's the classic AI struggle: mangled hands. For some reason, hands have always been the AI's kryptonite.
Practical Fixes for Common Issues
When an image comes out a little wonky, your instinct might be to just hit "generate" again. Resist that urge. A more targeted approach will save you a ton of time and frustration.
Here's what I do when things go south:
- Beef Up Your Negative Prompts: This is your best tool for steering the AI away from mistakes. If you're seeing warped faces or weird limbs, get specific. Add terms like
deformed hands, extra fingers, blurry eyes, plastic skin, mutationto your negative prompt to tell the AI exactly what not to do. - Tweak the CFG Scale: The Classifier-Free Guidance (CFG) scale is basically a leash on the AI. It controls how closely it sticks to your prompt. If your image looks too stiff or artificial, try lowering the CFG value to give it more creative breathing room. If it's straying too far from your idea, crank it up a bit.
- Roll the Dice with a New Seed: Every image starts from a "seed," which is just a random number. If you're getting results that are technically correct but just don't have the right vibe, generating with a new seed can give you a completely different interpretation of the same prompt.
The two biggest tells for an AI photo are almost always the hands and the eyes. If you can get those right, you're 90% of the way to creating something truly believable. Spend the extra time refining those details; it makes all the difference.
The AI image generator market is exploding right now. It was valued at USD 418.5 million and is expected to hit over USD 2.6 billion by 2035. You can read more about the expanding AI image market here.
All that growth means the tools are getting better at an incredible pace, making it easier than ever to fix these tiny but crucial flaws. Once you get the hang of these troubleshooting tricks, you'll be able to move past the common glitches and start creating consistently stunning, photorealistic images.
Got Questions About Realistic AI Photos?
As you dive into creating realistic AI photos, it's totally normal for a few questions to pop up. This technology moves fast, so let's tackle some of the most common things people wonder about.
So, Can I Actually Use These AI Photos for My Business?
Great question. The short answer is yes, usually you can. It all comes down to the terms of service of the AI tool you're using. A platform like CreateInfluencers gives you full commercial rights to the images you generate, which is a huge plus.
The key is to always double-check the fine print. Some services might have strings attached, especially if their AI was trained on copyrighted photos. It's always better to be safe than sorry.
How Do I Get the Same Person to Show Up in Different Photos?
This is the holy grail of AI image generation: character consistency. It can be tricky, but the best trick I've found is to use what’s called a “seed number.” Think of the seed as a starting recipe for your image.
When you use the same seed number and a very similar prompt each time, you're telling the AI to start from the exact same point. This makes it way more likely you'll get the same person in different clothes, settings, or poses. It's not foolproof, but it's the most reliable method out there.
The "uncanny valley" is that weird, creepy feeling you get from an image that's almost human but not quite right. The secret to avoiding it is embracing small, natural flaws.
What’s This “Uncanny Valley” Thing and How Do I Stay Out of It?
You know it when you see it—the slightly-off eyes, the weirdly smooth skin. To steer clear of the uncanny valley, you have to get specific with your prompts. Use negative prompts to tell the AI what you don't want, like 'perfect skin' or 'flawless symmetry.'
Then, add details that make someone look real. Think ‘subtle freckles,’ ‘faint skin pores,’ or an ‘asymmetrical smile.’ Getting the hands and eyes right is probably 80% of the battle, so pay extra attention to those details.
Which AI Is Really the Best for Creating People?
You've got a lot of options. Big names like Midjourney and Stable Diffusion are incredibly versatile and can do amazing things.
However, for generating truly realistic people and virtual influencers, specialized tools often have the edge. Platforms like CreateInfluencers are built for one purpose: creating lifelike humans. Their models are trained specifically on massive libraries of high-quality portraits, which gives them a real advantage in nailing those tiny details like skin texture, hair, and believable expressions.
Ready to see what you can create? Jump into CreateInfluencers and start making your own stunning, lifelike AI photos in just a few minutes. You can sign up for free and get started right away.