Creating a Realistic AI Photo That Fools Anyone
Learn to create a stunningly realistic AI photo. Our guide covers advanced prompting, model selection, and refinement techniques for photorealistic results.
A realistic AI photo isn't just a picture made by a machine; it's an image that could fool a professional photographer. It’s achieved by carefully blending detailed text prompts with a powerful AI model, essentially instructing the AI on everything from lighting and camera settings to the fine texture of a fabric. The goal is simple: create something that feels real, not artificially perfect.
What Separates Good AI Images from Great Ones
Have you ever looked at an AI-generated image and just known something was off? That subtle, uncanny feeling is what separates a decent AI picture from a truly great one. It’s not just about the AI you use; it’s about learning to give creative direction that the system can understand and execute flawlessly.
This isn't just a niche hobby anymore. Right now, a staggering 34 million AI images are created every single day by everyone from small business owners to massive global brands. That adds up to over 12 billion images a year, marking a huge shift in how we produce visual content. With the global AI market on track to hit $1.8 trillion by 2030, knowing how to create compelling AI visuals is becoming an essential skill. You can dive deeper into this visual revolution over at Photogptai.com.
Beyond Basic Prompts
To graduate from good to great, you have to start thinking like a photographer. Instead of just giving simple descriptions, you need to build the entire scene in your prompt.
A beginner might ask for "a man in a cafe."
A pro, however, paints a picture with words: "soft morning light filtering through the window," "steam gently rising from a ceramic coffee mug," and "a shallow depth of field that blurs the background."
It’s this level of detail that our HyperReal engine at CreateInfluencers is built for—it takes those complex instructions and turns them into a realistic AI photo that looks like it came straight from a camera.
The real secret to photorealism is found in the subtle imperfections. Genuine photos have a bit of grain, a hint of motion blur, and natural light that isn't perfectly even. When you start adding these elements to your prompts, you close the gap between a sterile AI image and a living, breathing photograph.
To nail these results every time, you need to get a handle on a few core elements.
Key Elements for Achieving Photorealism
To get you started, I’ve put together a quick breakdown of what matters most when you're crafting your prompts. Focusing on these areas will instantly elevate the quality and believability of every image you generate.
| Element | Description | Why It Matters |
|---|---|---|
| Lighting | Get specific with the type, direction, and mood, like "golden hour," "soft window light," or "dramatic backlighting." | Lighting is everything. It single-handedly defines the mood, creates shadows, and gives your image a sense of depth and reality. |
| Texture | Call out specific surface details, such as "visible skin pores," "rough linen fabric," or "weathered wood grain." | Texture is your best weapon against that overly smooth, "plastic" look common in AI images. It adds a layer of authenticity. |
| Camera Specs | Mention the gear you'd use in real life. Think "35mm lens," "shot on Portra 400 film," or "f/1.8 aperture." | These technical cues tell the AI exactly what style of real-world photography you want to replicate, from the lens distortion to the film grain. |
| Composition | Use classic photography terms to guide the layout, like "rule of thirds," "leading lines," or "Dutch angle." | A thoughtfully composed shot feels intentional and professional. It stops the AI from just placing subjects randomly in the frame. |
Nailing these four components is the foundation of creating consistently stunning, realistic AI photos. Once you start thinking in terms of light, texture, camera, and composition, you'll be amazed at the difference it makes.
Getting the Prompt Right for Unbelievably Real Photos
The prompt is everything. It's your conversation with the AI, and getting it right is the single most important factor for creating a photo that looks real. The secret isn't just about listing a few keywords; it's about mastering prompt engineering. This is where you go from just telling the AI what to make to actually directing a photoshoot.
To get good at this, you need to think like the machine. Understanding the basic Text To Image generation principles gives you a huge advantage because you start building instructions the AI can actually follow, not just guess at.
The Anatomy of a Powerful Prompt
Your prompt shouldn't be a single command. Think of it more like building a scene, layer by layer, with descriptive details. A weak prompt is flat and one-dimensional, but a strong one gives the AI a complete picture to work from.
Let's look at a real-world example of this in action:
- Basic Prompt:
a man in a cafe - Advanced Prompt:
Close-up portrait of a thoughtful man in his late 30s sitting in a cozy, sunlit cafe. Steam rises from his dark coffee mug, soft morning light filters through a large window, creating a warm glow on his face. He has a slight, contemplative smile. Shot on a 35mm lens, f/1.8 aperture for a shallow depth of field, background softly blurred.
See the difference? The advanced prompt is packed with specifics—the subject's age and mood, the environment, the lighting, and even the exact camera settings. You're painting a picture with your words, leaving almost nothing to chance. This level of detail is how you push the AI toward true photorealism.
Keywords That Force a Realistic Look
Some words are like cheat codes. They act as triggers that tell the AI to lean into specific photographic styles, which is one of the fastest ways to get a more believable image.
Here are a few of my favorites to sprinkle into your prompts:
- Film Stock: Mentioning film types like
shot on Portra 400 filmorKodak Ektar 100tells the AI to add specific grain, color palettes, and tones that mimic classic film photography. - Lighting Cues: Don't just say "light." Be specific. Use terms like
cinematic lighting,softbox lighting,golden hour, or the classicdramatic Rembrandt lightingto completely control the vibe of the shot. - Lens and Aperture: Specifying a
35mm lens, an85mm portrait lens, or an aperture likef/1.8is how you control the depth of field, perspective, and that beautiful background blur (bokeh) you see in professional photos.
When you layer these photographic terms, you're doing more than just describing a scene. You’re handing the AI a technical blueprint for building the image you see in your head. This is what good prompt engineering is all about.
If you're ready to go even deeper and master creating consistent AI characters and elaborate scenes, our library of CreateInfluencers guides has you covered. We get into all the advanced strategies you'll need to fine-tune your skills and produce incredible visuals for any project.
Choosing the Right AI Model and Settings
The first real step toward a believable AI photo is picking the right tool for the job. You’ll quickly find that not all AI generators are the same; each has its own personality, its own strengths, and its own little quirks. Some, like Midjourney, are famous for their artistic, almost painterly results. Others, particularly those built on Stable Diffusion, give you a ridiculous amount of control, which is exactly what you need when you're chasing photorealism.
This whole space is moving at lightning speed. What felt like a niche hobby a couple of years ago has blown up. The global market for AI image generators was valued at USD 418.5 million and is expected to hit a massive USD 2,633.2 million by 2035. With North America making up nearly 40% of that market, it's clear these tools are becoming standard issue for creatives. You can dig into more of those numbers in this MetaTech Insights report. All this growth is great—it means more options—but it also means you have to be smarter about picking the right platform.
Comparing the Top AI Models
To make a good choice, you have to get to know the leading models. I like to think of them as different photographers, each with their own go-to style.
For Portraits and People: A model like our own HyperReal engine at CreateInfluencers is a specialist. It’s been trained specifically on huge libraries of human faces and bodies. That’s why it’s so good at nailing the tricky stuff—lifelike skin textures, eyes that have depth, and hair that doesn’t look like a plastic helmet.
For Landscapes and Environments: Other generators are built for epic, sprawling scenes. They tend to be better at rendering complex natural textures like dense forests, flowing water, or the intricate details of a city skyline without the image falling apart.
For Stylized Realism: Then you have platforms that are masters of a specific vibe. They can make an image look like it was shot on old-school film or pulled straight from a high-fashion editorial. You get a photo that feels real but also has a very distinct, deliberate aesthetic.
Mastering Essential AI Settings
Once you've settled on a model, the real fun begins: tweaking the settings. If you want true photorealism, you can't just stick with the defaults. The two most important dials you’ll need to get comfortable with are the Guidance Scale (CFG) and Steps.
I always tell people to think of the CFG Scale as a leash on your AI. A low value gives it a lot of creative freedom to run with your prompt, which can be fun but often strays from what you asked for. A high value keeps it on a tight leash, forcing it to stick very closely to your instructions—essential for a realistic AI photo.
The Steps setting is all about refinement. It tells the AI how many times to work over the image, adding more detail with each pass. Generally, more steps equals a sharper, more polished result. But be careful, because there's a point where you start to see diminishing returns. Crank the steps too high and you can over-bake the image, making it look strangely smooth and artificial. Plus, it takes longer to generate.
My advice? Start with a CFG Scale somewhere between 7 and 10 and set your Steps between 25 and 40. That’s a solid baseline. From there, you can start experimenting. If your image looks a little too wild and creative, nudge the CFG up. If it’s lacking those crisp, fine details, try adding a few more steps. Getting a feel for how these two settings work together is what gives you real control over the final image.
Using Advanced Techniques to Refine Your Image
Getting a good first draft of your image is a great start, but the real magic happens in the refinement stage. This is where you take a promising AI-generated picture and polish it into something truly flawless and realistic by fixing the little quirks and dialing in the details. Think of it as your own digital darkroom.
These are the pro-level workflows that separate the hobbyist results from expert-level creations. It’s amazing how small, targeted adjustments can transform a slightly "off" image into one that's virtually indistinguishable from a professional photograph. The key is understanding that you don't always have to start over from scratch.
The Power of Negative Prompts
One of the most effective tools in your toolkit is the negative prompt. It’s exactly what it sounds like—a way to tell the AI what you don’t want to see in the final image. This is often just as important as describing what you do want. Left to their own devices, AI models can sometimes lean toward more artistic or illustrated styles.
A well-crafted negative prompt acts as a set of guardrails, steering the AI away from common mistakes. For instance, if your portraits keep coming out looking a bit too smooth or cartoonish, a simple negative prompt can make all the difference.
Here are a few essential negative keywords I always keep on hand:
cartoon, illustration, painting, drawing, animedeformed, disfigured, ugly, bad anatomyblurry, grainy, out of focus, low qualitywatermark, signature, text, username
By explicitly telling the AI to avoid these things, you significantly boost your chances of getting a clean, crisp, and believable photo on the first go. It's a simple habit that saves a ton of time.
Iterative Refinement With Inpainting
So, what do you do about those small but glaring errors, like wonky hands or unnatural-looking eyes? It can be incredibly frustrating to regenerate an entire image when you love everything else about the composition. This is where inpainting becomes your best friend.
Inpainting lets you mask a specific area of your generated image and then regenerate only that part with a new, more specific prompt. Did you get a hand with six fingers? Just mask it and prompt for a "perfectly formed human hand." Is one eye looking slightly off-kilter? Mask it, and let the AI regenerate just that eye. This iterative process gives you surgical control, letting you perfect your image without losing all the parts that are already working well.
The infographic below shows how the initial model and settings you choose lay the foundation for the image you'll later refine. Getting this part right makes techniques like inpainting much more effective.
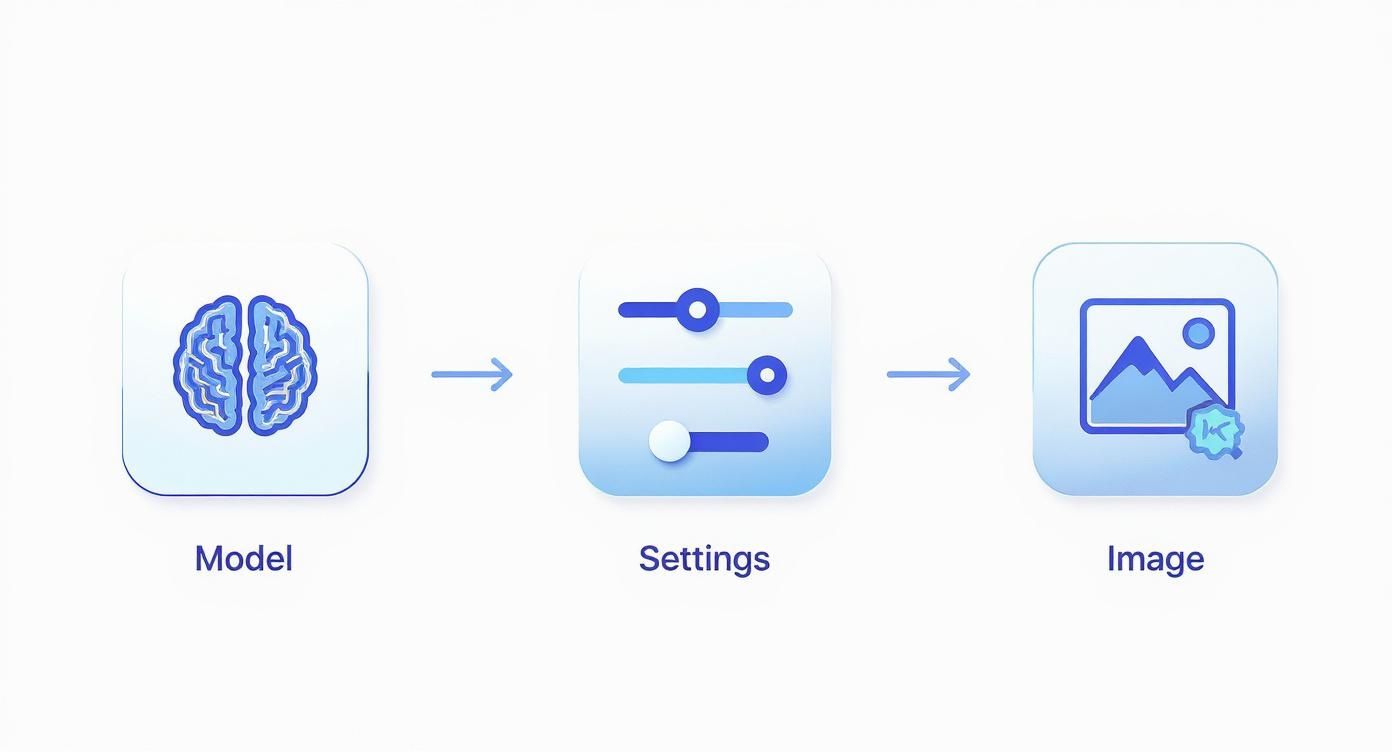
This flow really drives home that your first choices directly influence the raw material you'll be working with. A solid base makes the refinement process much smoother.
Prompt Modifiers for Enhanced Realism
Beyond just negative prompts, you can add specific keywords to your main prompt to nudge the AI toward a more photographic style. These "modifiers" are like giving the director (the AI) notes on camera choice, lighting, and overall mood.
Below is a quick reference table I put together to show how different types of keywords can dramatically influence the realism of your output.
| Modifier Type | Example Keywords | Effect on Image |
|---|---|---|
| Camera/Lens | 35mm lens, f/1.8, DSLR, cinematic shot |
Simulates a specific camera setup, adding realistic depth of field and lens characteristics. |
| Lighting | soft light, golden hour, studio lighting, volumetric lighting |
Defines the light source, creating natural shadows, highlights, and a specific mood. |
| Style/Realism | photorealistic, ultra-realistic, detailed skin texture |
Explicitly instructs the AI to aim for high-fidelity, photograph-like detail. |
| Film Type | Kodak Portra 400, Fujifilm Superia, black and white film |
Mimics the grain, color science, and texture of classic analog film stocks. |
Experimenting with these is one of the best ways to get out of the "AI look" rut and start producing images with genuine photographic qualities.
Maintaining Consistency With Seed Numbers
Let's say you've generated a nearly perfect image, but you want to make one tiny change—like turning a blue shirt red—while keeping everything else exactly the same. That’s where seed numbers come into play. A seed is a unique number that dictates the random starting point the AI uses to begin generating an image.
By reusing the same seed number, you’re telling the AI to start from the exact same initial state every single time. This ensures the overall composition, lighting, and even the subject's pose remain consistent between generations, allowing you to make small, targeted changes to your prompt without completely scrambling the image.
This technique is absolutely essential if you're creating a series of related images or just trying to fine-tune a single concept. If you want to see how these advanced methods are applied in real-world creative projects, check out the case studies on the CreateInfluencers blog. Once you get the hang of controlling the seed, you'll feel like you have true creative command over the entire process.
Putting Your Realistic AI Photos to Work
You've honed your skills and can now create some seriously realistic AI photos. But the real fun starts when you put them to work. This isn't just a cool tech trick; it's a practical tool for marketing, building a brand, or just creating amazing content. The applications are everywhere, and they can save you a ton of money.
Think about something as simple as a new LinkedIn profile picture. The old way meant finding and hiring a photographer, which could easily set you back $200 to $500 for a single session. The AI headshot industry blew up because it solved this exact problem, giving people dozens of incredibly lifelike options for a tiny fraction of that cost.
What was once a novelty has quickly become a standard business tool, making professional-quality images accessible to everyone. The market growth for AI-generated headshots has been staggering.
E-commerce and Product Photography
Let's say you run an e-commerce store selling handcrafted jewelry. Arranging a lifestyle photoshoot is a huge hassle—it's expensive, takes a lot of time, and requires coordinating models, locations, and photographers.
Now, you can skip all that. Instead, you can generate an endless stream of images showing different models wearing your products in any setting you can dream up. This is a massive advantage for small businesses trying to compete on a tight budget.
For example, a prompt could look something like this:
"Photorealistic lifestyle shot of a woman with olive skin and dark hair wearing a delicate gold necklace. She is sitting at an outdoor cafe in Paris, soft morning light, candid smile. Shot on a Canon EOS R5 with an 85mm f/1.2 lens, shallow depth of field, natural and unposed."
This prompt gives the AI a clear subject, a specific environment, and even the exact camera and lens details needed to create a stunning commercial image. For anyone curious about diving deeper into this, checking out how AI product photography for fashion brands is being used can offer some great ideas.
Content Creation for Bloggers and Marketers
Here’s another great use case. Imagine you're a travel blogger who needs beautiful, on-brand images to bring your articles to life. Your options used to be digging through generic stock photo sites or using your own potentially amateur shots.
Now, you can create perfectly customized visuals that match the exact mood and topic of your post, and you don't have to worry about paying royalty fees.
A travel blogger might use a prompt like this:
"Wide-angle shot of a vibrant, bustling street market in Marrakech. Sun-drenched scene with colorful spices in woven baskets, locals interacting. Photorealistic, captured with a Fuji X-T4, cinematic color grading, rich textures, high detail."
Key Takeaway: The secret is to think like a creative director, not just a user. Don't just ask for a "picture of a market." Get specific. Combine your subject, the environment, the lighting, and even the technical camera specs to guide the AI. When you do that, you unlock the power to generate unlimited, royalty-free images for literally any project.
With tools like CreateInfluencers, you have a nonstop source of unique visuals at your fingertips, whether you need a polished headshot or a dynamic product shot.
Your Top Questions About AI Photos, Answered
Once you dive into creating realistic AI photos, you'll probably run into a few common questions. From the legal side of things to fixing those strange-looking hands, getting these answers sorted out is the key to using this tech with confidence. I've put together the most common questions I hear to help you get started.
Let's tackle the big one first.
Can I Actually Use My AI Photos for Business?
For the most part, yes. But it’s not quite that simple.
Most AI image platforms, including CreateInfluencers, give you full commercial rights to the images you generate. That means you're free to use them in your marketing campaigns, on product packaging, for social media ads—you name it.
The thing is, the legal side of AI-generated art is still catching up. Copyright laws are a bit of a gray area and can differ depending on where you are.
My best advice? Always, always read the terms of service for whatever tool you're using. That document is your source of truth and will lay out exactly what's allowed.
How Do I Fix Those Weird-Looking Hands and Eyes?
You know the ones I'm talking about—the classic AI giveaways. Those slightly off eyes or a hand with six fingers can instantly ruin an otherwise perfect shot. The fix isn't to scrap the image and start over, but to do some targeted editing with a feature called inpainting.
Think of it like digital surgery. Instead of regenerating the whole picture, inpainting lets you zero in on the problem.
- First, you mask the specific area you want to fix, like just the hand or one of the eyes.
- Next, you give the AI a new, super-specific prompt for that tiny section. Something like, "a realistic woman's hand holding a coffee cup, five fingers."
- Then, you regenerate only the masked part. The AI re-draws just that selection, blending it right into the rest of the photo.
This approach is a lifesaver. It gives you incredible control and saves you from the frustration of losing the parts of the image you already love.
How Can I Create the Same Character in Different Pictures?
This is a huge one, especially if you're building a brand, a virtual influencer, or telling a story. Getting that consistent look across dozens of images comes down to one little thing: seed numbers.
A seed is basically the starting point for the AI's creative process. It's a unique number that dictates the initial randomness.
If you use the exact same seed number for every new image you create, the AI will keep the core features of your character consistent—their face shape, hair color, and general vibe. From there, you can tweak the rest of the prompt to change their clothes, the background, or their expression, all while keeping your character perfectly recognizable. It's the secret to building a cohesive visual identity.
Ready to put all this into practice? With CreateInfluencers, you can build your own custom AI characters, clean up any imperfections in a snap, and get incredible, high-quality images in just a few minutes. Start creating for free today at CreateInfluencers.com