Your Guide to an Avatar Creator Superhero
Discover how to use an avatar creator superhero tool to design a unique digital hero. This guide offers actionable tips for crafting the perfect AI avatar.
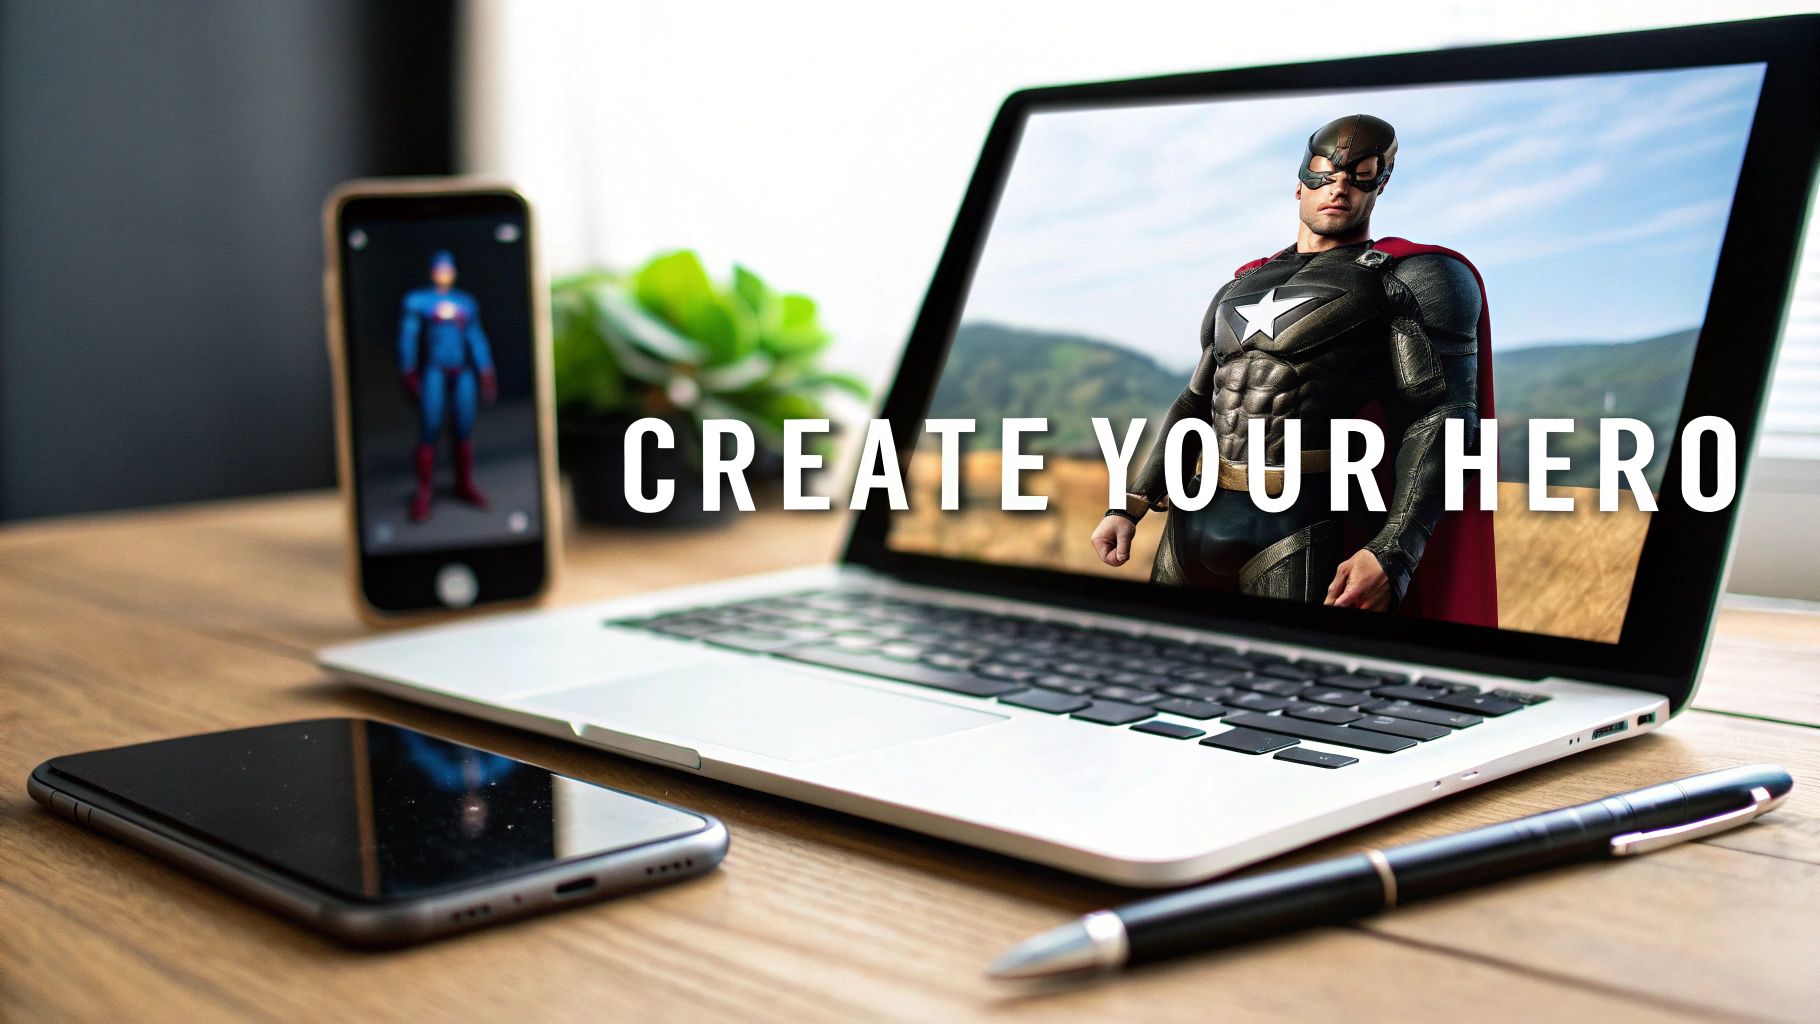
Ever wondered what you’d look like as a superhero? I’m not talking about a cheesy photo filter that just slaps a mask on your face. I mean a full-blown heroic transformation, where an AI rebuilds your likeness into a unique character, cape, armor, and all.
This technology is no longer science fiction. It’s a powerful and accessible way to create a digital persona for your gaming profiles, social media, or just for fun.
From Selfie to Superhero: Your AI Transformation

Think about it—that vision of yourself with a custom suit or a flowing cape is now just a few clicks away. Modern AI tools can take a simple photo, analyze your distinct facial features, and then reimagine you in any style you can dream up. We're talking everything from a gritty comic book look to a hyper-realistic 3D render. This is about building a heroic version of you from the ground up.
This guide is your roadmap. I'll walk you through how to use a platform like CreateInfluencers to design a powerful digital identity. We’ll get into the nitty-gritty of choosing the right source photo and writing descriptive prompts that coax the AI into generating the exact hero you have in mind.
What's the Big Deal with a Superhero Avatar?
In a sea of generic profile pictures, a custom superhero avatar is your secret weapon to stand out. It’s more than just a picture; it’s a statement that tells a story about your personality and makes your presence memorable.
For gamers, this is about forging an identity that truly reflects your in-game persona. If you're a content creator, it’s a powerful branding tool that can stop people mid-scroll and grab their attention.
Here are just a few ways people are using them:
- Gaming Profiles: Crafting custom avatars for Discord, Twitch, or Steam that perfectly match their play style.
- Social Media: Swapping out a bland headshot for a heroic alter ego on Instagram or X.
- Creative Projects: Generating concept art for a personal story, a webcomic, or even a D&D campaign.
A great AI avatar communicates a narrative instantly. Your heroic persona can project strength, mystery, or even a bit of mischief without you ever typing a word. It’s about making that digital first impression count.
This isn't just a niche hobby; it's a rapidly growing trend. The 3D avatar creator market was valued at a massive $1.17 billion in 2024 and is projected to hit $1.38 billion by 2025, largely thanks to the explosion of online gaming and social media.
This guide will give you the practical skills to jump into this creative space. Once you get the hang of photo selection and prompt writing, you'll be directing the AI to produce stunning, high-quality superheroes that are unmistakably you.
Getting the Right Photo: Your Hero's Origin Story
The secret to an incredible AI-generated hero is all in the photo you start with. Think of it this way: you're giving the AI a blueprint of your face. A blurry, poorly lit selfie will only lead to a generic, maybe even distorted, avatar. But a sharp, clear picture? That’s the raw material for something truly epic.
You don't need a fancy DSLR for this. Your smartphone camera is perfectly fine. The real goal is to feed the avatar creator superhero tool as much clean, accurate facial data as possible. We’re talking about clarity, lighting, and expression. Getting this right is the single most important part of the whole process—it's what makes the final result look like you, just with superpowers.
Nail the Lighting and Background
Good lighting isn't optional; it's everything. It carves out your facial features—your jawline, your nose, your eyes—which is exactly what the AI needs to see to work its magic. Luckily, the best light is often the simplest.
For the best results, just stand facing a window during the day. That soft, natural light erases the harsh shadows that can trip up the AI. If daylight isn't available, a ring light or even a lamp placed directly in front of you will do the trick.
Here are a few common lighting mistakes I see all the time. Try to avoid them:
- Backlighting: If you stand with a bright window or light behind you, you’ll just end up as a silhouette. The AI won't be able to see your face at all.
- Harsh Overhead Light: This is the classic culprit for creating unflattering shadows under your eyes, sometimes called "raccoon eyes," which hides your features.
- Mixed Lighting: Using a warm lamp and cool daylight from a window at the same time can throw off your skin tone and confuse the algorithm.
As for your background, keep it simple. A plain wall is your best friend here—white, gray, it doesn't matter as long as it's a solid color. A cluttered room with posters, furniture, or other people in the shot will only distract the AI from focusing on you.
My Personal Tip: Your expression really sets the tone. A straight face is great for a stoic, guardian-type hero. But if you're going for more of a rebellious anti-hero, a slight, confident smirk works wonders. Think about the personality you want to project and let it come through.
A Quick Checklist for the Perfect Shot
Taking a moment to get the photo right saves a ton of headaches later. Before you hit that upload button, just run through this quick mental checklist. It ensures you’re giving the AI the best possible instructions for your transformation.
The AI is smart, but it can't read your mind. A high-quality photo is the instruction manual it needs.
The "Must-Do" List:
- Look Right at the Camera: Make direct eye contact with the lens.
- Show Your Whole Face: Take off any hats, sunglasses, or anything else that might cover up your features. Your everyday glasses are usually fine, though.
- Go High-Res: Make sure the picture is sharp. Zoom in a bit to check for any pixelation or blurriness.
- Keep Your Shirt Simple: A plain, solid-colored t-shirt is perfect. I've found that busy patterns can sometimes get blended into the AI-generated costume.
The "Definitely-Don't" List:
- No Social Media Filters: Ditch any Instagram or Snapchat filters. They mess with your facial structure and skin texture, which is the exact opposite of what we want.
- Avoid Extreme Expressions: A huge, goofy grin or an overly dramatic frown can lead to some pretty weird-looking results.
- Don't Use Old, Blurry Photos: The AI needs fresh, clear data. A recent picture is always best.
- Stay in the Frame: Make sure your entire head and at least your shoulders are in the shot. Don't crop off the top of your head or your chin
Bringing Your Heroic Vision to Life
Okay, you’ve got your perfect photo. Now for the fun part. We're heading into the digital workshop where your selfie gets its superhero upgrade. This is where the avatar creator superhero tool really shines.
Uploading your picture and picking a basic style is easy enough, but the real creative power comes from how you talk to the AI. Think of yourself as a film director guiding a special effects artist. Your words are the raw materials for everything from the hero's armor to the crackle of their energy powers.
Instead of a generic "make me a superhero," you'll get much more compelling results by being specific. This is where you take charge and make confident choices to build a character that's truly yours.
Mastering the Art of the Text Prompt
The text prompt is your direct line to the AI's creative engine, and specificity is your best friend. A lazy prompt like "cool armor" will probably spit out something you've seen a thousand times. But a detailed description? That's where you unlock some incredible, one-of-a-kind designs.
The trick is to paint a picture with your words. Focus on materials, colors, textures, and specific objects.
Let's look at a few practical examples:
- Cosmic Sorcerer: Don't just say "magic effects." Try something like, "a swirling cape the color of a nebula, with glowing runes etched into the shoulder armor."
- Street-Level Vigilante: Instead of "dark costume," describe it. "A tactical suit made of dark gray kevlar, with a weathered leather utility belt and reinforced gauntlets."
- High-Tech Warrior: Move beyond "futuristic suit." Get descriptive: "A gleaming chest plate with a phoenix insignia, powered by pulsing blue energy lines."
See the difference? This level of detail gives the AI clear instructions, steering it away from tired clichés and toward your unique vision. Don't be shy about using evocative adjectives to set the mood. If you're ever stuck, we've got a ton of ideas and guides over on the CreateInfluencers blog.
Pro Tip: Try mashing up different concepts. Something like "a medieval knight's helmet fused with futuristic cyberpunk neon lights" can produce a wild hybrid style that will make your character stand out.
The whole process is actually pretty straightforward once you get the hang of it. It’s just a few key stages, as this little breakdown shows.
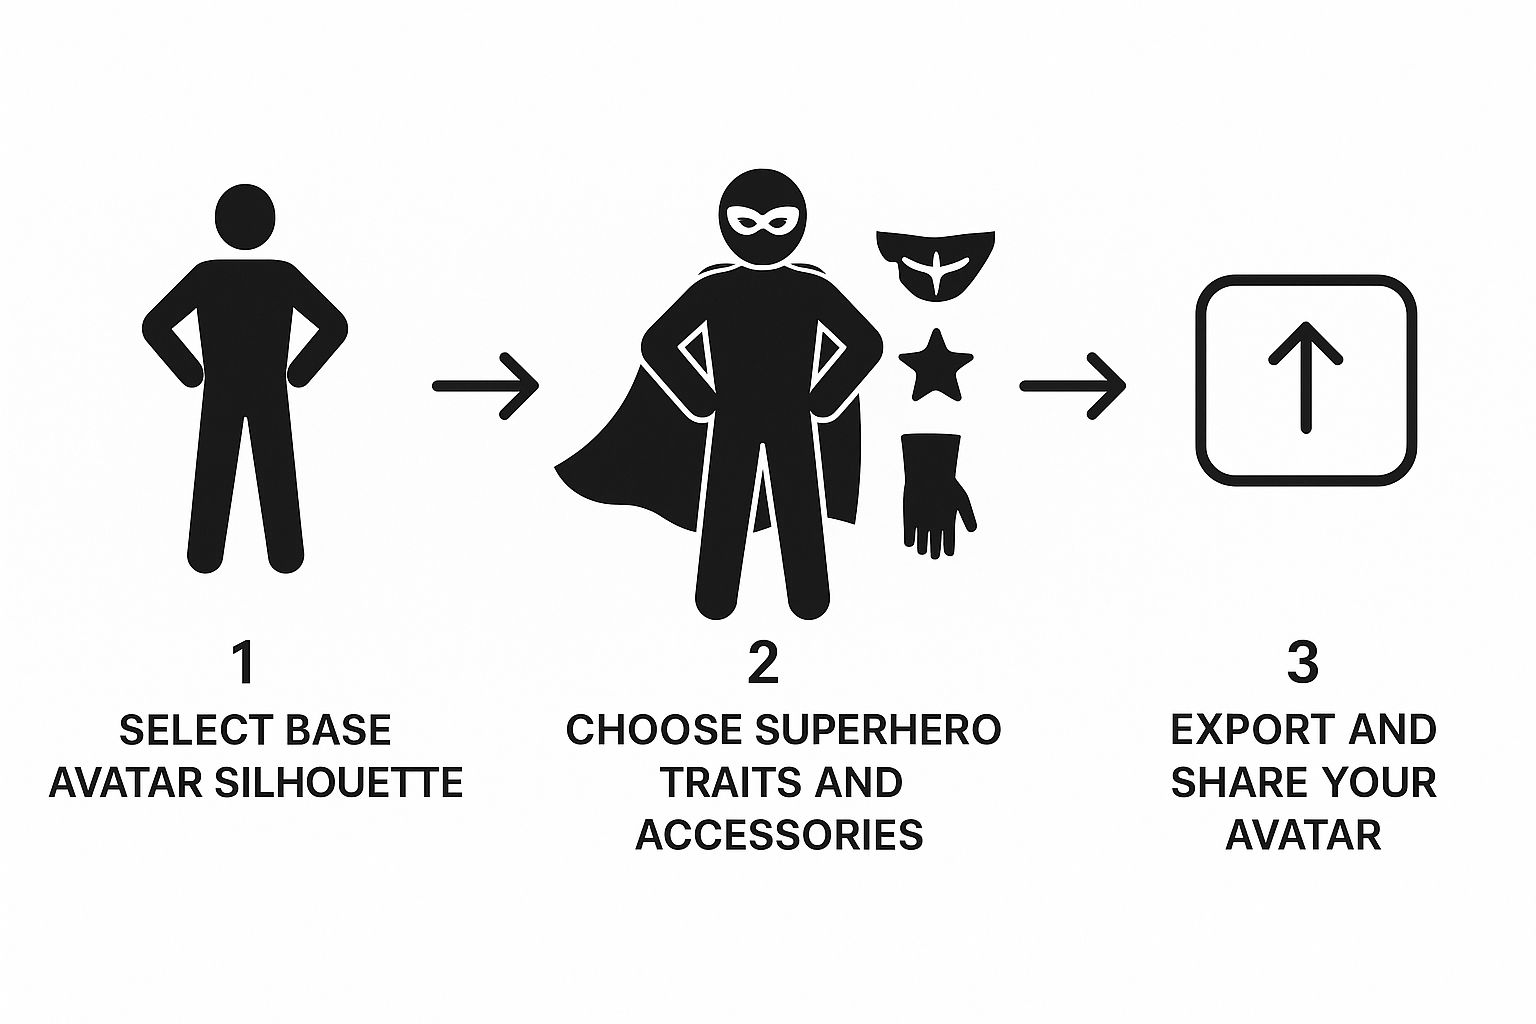
As you can see, it's a simple, repeatable flow: you have an idea, you select some options, and then you refine it until it’s perfect.
Fine-Tuning Your Hero's Look
Once the AI generates a base design you like, the real fine-tuning begins. This is where you can get picky and really make the character pop. Small tweaks to your prompt can have a huge impact, letting you perfect everything from the design of a mask to the color of an energy blast.
This desire for detailed customization isn't just a niche interest; it's a huge driver of growth in the creative tech space. The global 3D avatar creator market was valued at an impressive $1.5 billion in 2023 and is projected to hit $5.2 billion by 2032, largely thanks to the rise of AR and VR.
This is exactly how you can use prompts to dial in those specific elements right inside the CreateInfluencers tool.
Notice how the text field is designed for descriptive phrases. This is what gives you that granular control over the final look, letting you adjust and experiment until your vision is perfectly rendered.
Diving Deeper: Advanced Prompts and Pro-Level Customization

Alright, so you've got the hang of writing basic descriptions. Now it's time to really take the wheel and tell the AI exactly what you want. The difference between a cool image and a professional-grade character design often comes down to the subtle art of prompt engineering. This is where you learn to guide the AI with surgical precision, not just broad suggestions.
When you're just starting, you tell the AI what to make. But to get truly unique results, you also have to tell it what to avoid. This is a total game-changer for refining your hero's look and getting rid of those little details that just don't feel right.
The Power of Negative Prompts and Prompt Weights
Let's get into the good stuff. Two of the most powerful tools in your arsenal are negative prompts and prompt weights. Mastering these will give you a degree of control that a simple descriptive sentence just can't match.
A negative prompt does exactly what it says on the tin: it tells the AI what not to generate. It’s incredibly useful for chipping away at unwanted elements without having to rewrite your entire prompt from scratch.
Think about these situations:
--no helmet: Perfect when you love the armor design but absolutely need to see your hero's face.--no sword: Your character is a hand-to-hand brawler, not a weapons master.--no cape: You're going for that gritty, street-level vigilante vibe, and a flowing cape just kills the mood.
Prompt weights work a bit differently. They let you dial up the importance of specific words in your prompt. By wrapping a word or phrase in parentheses, like (glowing blue eyes), you're telling the AI, "Hey, this part is really important." It forces the generator to prioritize that detail over others.
Mashing Up Styles and Nailing Dynamic Poses
Here’s another pro-level trick: start mixing and matching different artistic styles within a single prompt. This is how you create an aesthetic that’s completely your own and makes your avatar pop. Instead of sticking to a generic "comic book style," get creative and see what happens when you combine concepts.
For example, try prompting something like: a superhero in the style of (art deco) and (cyberpunk). This command pushes the AI to blend the elegant, geometric lines of art deco with the high-tech, neon-soaked world of cyberpunk. The result is a hero who feels both timeless and straight from the future.
The real secret is to start thinking like an art director. Your prompt is your creative brief. When you combine styles, crank up the emphasis on key details with weights, and subtract what you don’t want with negatives, you unlock a powerful toolkit for your avatar creator superhero projects.
This drive for deep personalization is exactly why the digital identity space is blowing up. The AI avatar market is projected to skyrocket from $0.80 billion in 2025 to an incredible $5.93 billion by 2032. People want unique digital experiences, and custom avatars are at the heart of it all. You can get more insights on this trend by checking out the future of AI avatars on marketsandmarkets.com.
The best way to get a feel for these techniques is to just jump in and start experimenting. If you want to see more real-world examples and prompting formulas, take a look at our other in-depth guides for creators.
Bringing Your Superhero Avatar Into the World
Alright, the creative part is done. You’ve gone through the process, tweaked the details, and now you have a superhero that looks absolutely epic. So, what’s next? It's time to get that avatar out of the design studio and into the real world.
How you save your final image is more important than you might think. This last step determines the quality and how you can use your new hero across the web. Get this right, and you'll preserve every little detail you worked so hard on.
Dialing in Your Final Render Settings
When you hit that save button, you'll likely face a choice between a few file types, usually JPG and PNG. They might seem similar, but the difference is huge for what you can do later.
JPG (or JPEG): Think of this as the standard, everyday image format. JPGs are great for keeping file sizes small, which is a big plus for fast-loading websites. The catch? They use a "lossy" compression, which means to shrink the file, they sacrifice a tiny bit of image quality. It's often unnoticeable, but for a sharp, detailed hero, it might not be ideal.
PNG: This is the format I almost always recommend for avatars. PNGs use "lossless" compression, which means zero quality is lost. Your image stays perfectly crisp. The real game-changer, though, is their support for transparent backgrounds. This is a massive advantage.
For just about everything you'll do with your avatar—from profile pics to custom graphics—a high-definition PNG is the way to go. That transparent background means you can drop your hero onto any backdrop without that ugly white box framing them. It looks professional and seamless.
Unleashing Your Hero's Potential
Your new avatar isn't just a static picture; it's a dynamic part of your online identity. It's a branding tool, a conversation starter, and a way to show off your creativity.
Don't just stop at swapping out an old headshot. Here are a few ideas to really put your creation to work:
- Dominate Your Social Profiles: Why stop at a profile picture? Craft some killer custom banners for your X, Discord, or Twitch channels featuring your hero in an awesome action pose.
- Design Your Own Merch: Create unique phone cases, desktop wallpapers, or even stickers. It's a cool way to keep your heroic alter ego with you everywhere.
- Kickstart Creative Projects: Is this hero the star of a webcomic you've been dreaming up? Maybe they're your next Dungeons & Dragons character? Use the avatar as official concept art to bring your stories to life.
- Forge a Consistent Brand: Use the same avatar across all your gaming handles and social media accounts. It builds a recognizable persona that people will remember.
Honestly, you're only limited by your imagination here.
And hey, if you find that people are constantly asking how you made your awesome avatars, you might be a great fit for our partner program. You can actually earn money just by sharing the tool with others. You can learn more about becoming a CreateInfluencers affiliate partner on our site.
Have a Question? Your Superhero Avatar FAQ
As you get into the final stages of creating your superhero, a few common questions tend to pop up. Think of this as your field guide to troubleshooting those last-minute tweaks and getting a result you'll be proud to show off.
"I've found that the secret to an amazing transformation is simple: start with a focused selfie and don't be shy with your prompts."
Getting these two things right from the beginning saves a ton of time. You'll avoid blurry or weirdly morphed faces and get closer to your ideal hero on the very first try.
Let's dive into some of the questions I hear most often.
Can I Use a Group Photo to Create My Superhero?
Honestly, you'll get the best results if you stick to a solo shot. Group photos can really throw off the AI's facial mapping, sometimes even blending features from different people together. A clear, well-lit picture of just you is the way to go.
Here's why a single-person photo works better:
- Spot-On Facial Recognition: When the AI only has one face to analyze, it can lock onto your features without getting confused. This means less distortion and a more accurate "you."
- Consistent Lighting: A photo of just you usually has more predictable lighting and shadows, which helps the AI render your features cleanly.
- No Background Noise: A simple, uncluttered background keeps the focus right where it needs to be: on your face.
How Specific Should I Get with My Text Prompts?
The more detail you give, the better your avatar will be. It's really that simple. Vague instructions like "red armor" will get you something, well, red and generic. But if you want a hero that looks truly unique, you need to paint a picture with your words.
Think about the difference a few extra words can make:
| Prompt Detail Level | What You'll Likely Get | A Pro Tip to Level Up |
|---|---|---|
| Basic ("red armor") | A standard, bright red suit. Pretty simple. | Try adding textures. Something like "crimson battle-worn leather" adds instant character. |
| Detailed ("crimson…") | Now you're talking! You'll get a unique, textured chest piece, maybe with gold trim. | Go even further. Specify accessories, the background, or even the lighting. |
| Hybrid ("no helmet") | This is a great way to ensure your face is the focus. | Use negative prompts like this to clearly tell the AI what not to include. |
Getting Your Photos and Prompts Just Right
What If I Don't Like the First Avatar It Creates?
Don't sweat it! The first generation is often just a starting point. The real magic happens when you start iterating. Changing just one word or swapping in a selfie from a different angle can completely change the outcome.
Here are a few things to try:
- Change an Adjective: Simply switching from "glossy chrome armor" to "scratched steel armor" can produce a totally different vibe.
- Tweak the Lighting: Adding a phrase like "lit by a soft purple glow" can instantly alter the mood of the entire image.
- Try a New Selfie: Sometimes, a new facial expression is all it takes to inspire a winning design.
A Quick Word on Prompt Safety
Before you hit that generate button, give your prompt one last read-through. Make sure it's clear and doesn't contain any confusing or ambiguous terms. A quick five-second check can save you from wasting credits on a failed generation.
Are There Any Restrictions on the Kinds of Superheroes I Can Make?
You have a massive amount of creative freedom, but you'll want to steer clear of using copyrighted names. Trying to generate "Spider-Man" or "Wonder Woman" can lead to some unpredictable results or even violate the platform's terms.
A much better approach is to describe the traits of the hero you want, rather than using a brand name.
Here's a good rule of thumb:
- Avoid mentioning famous hero or villain names directly.
- Instead, focus on visual descriptions like "glowing blue eyes," "a cape made of starlight," or "web-patterned gauntlets."
- Invent your own unique symbols and emblems to make your hero truly one-of-a-kind.
By keeping these tips in mind, you can ensure your final avatar is a true reflection of your imagination, without any weird glitches or legal hiccups. Use these insights to make your creation process smoother and craft a hero that perfectly fits your vision.
Ready to bring your own hero to life? Sign up for CreateInfluencers and start your transformation today